Naailes/sewing lesson: Jaxx baby leggings
In deze naailes leer je om een babylegging te naaien met het Jaxx naaipatroon. Het naaipatroon is voor 6,95 euro te koop in mijn webwinkel. Jaxx is een babybroekje of legging van maat 38 (prematuur) tot en met maat 92 (dreumes/peuter). Je kunt het broekje maken met een zoom, dan is het een legging. Maar je kunt er ook een smalle of brede boord onder zetten, waardoor het een skinny broekje wordt. De brede boord kun je eerst omvouwen, zodat het broekje wat korter wordt.
In deze naailes leer ik jullie de variant met zoom.
In this sewing lesson you will learn to sew a baby legging with the Jaxx sewing pattern. The sewing pattern is available in my webshop for 6,95 euros. The description is in Dutch, but in this blog you can read how you have to sew the Jaxx pants. The Jaxx pants are baby pants or leggings from size 38 (premature) to size 92 (toddler). You can make the bottom with a seam, then it will be leggings. But you can also put a small or large cuff on legs.
In this sewing lesson I will teach you the leggings with a seam.
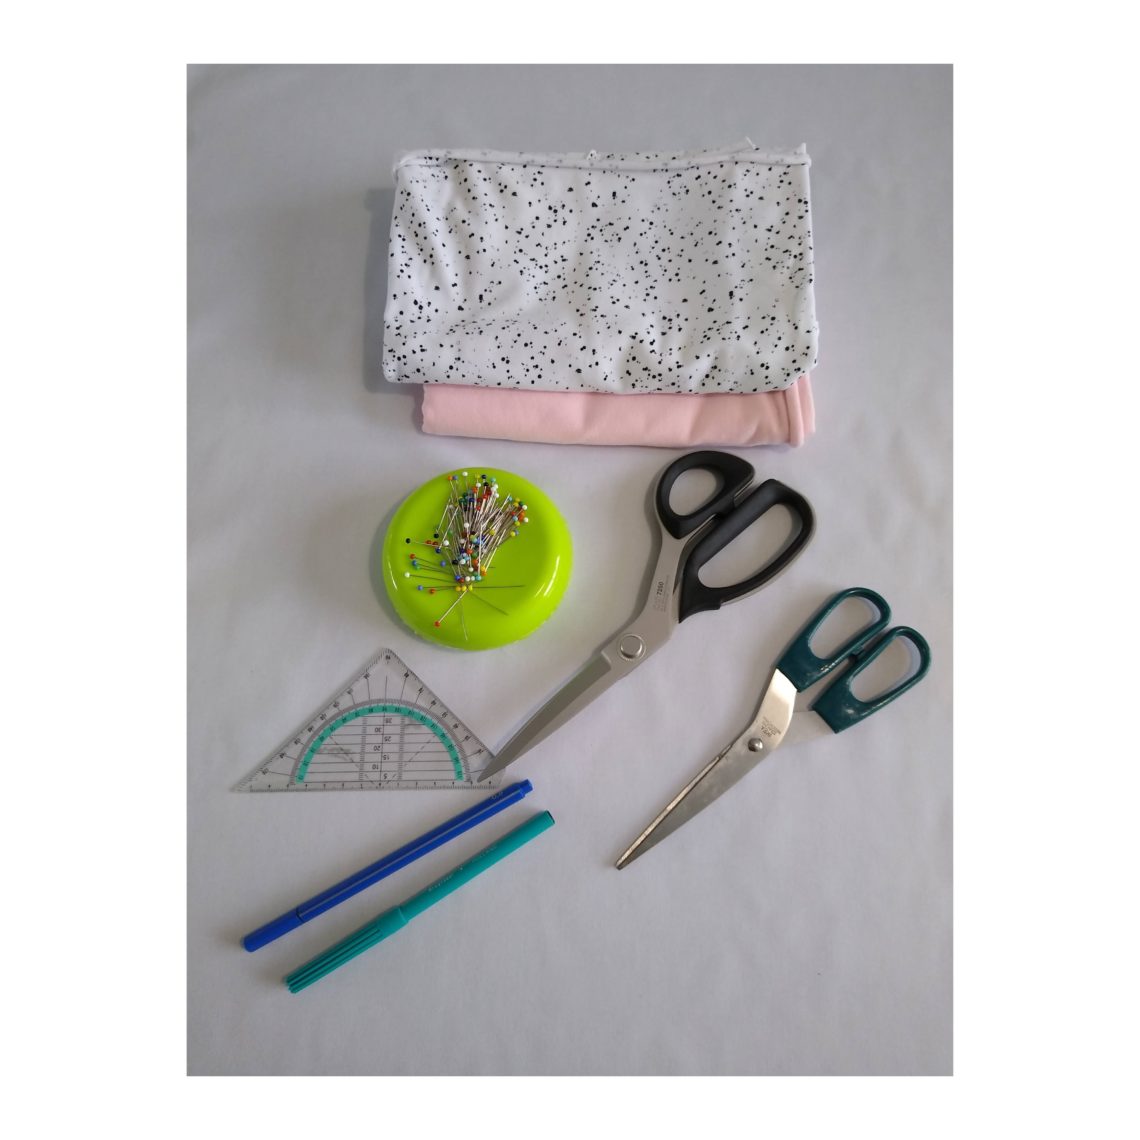
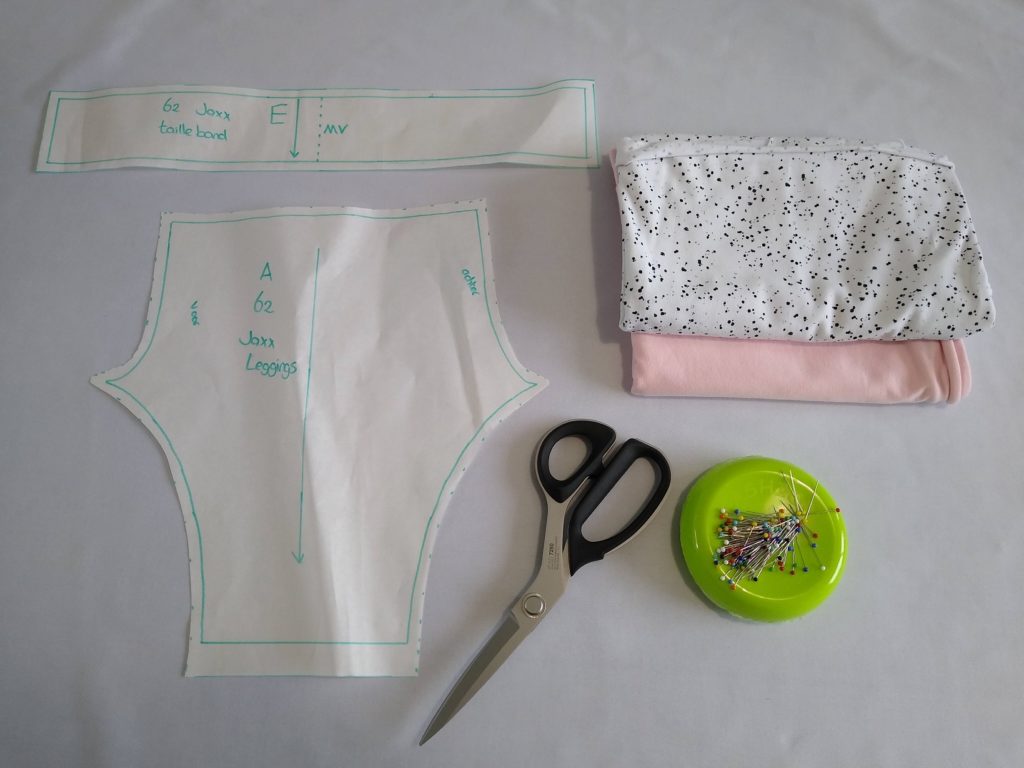
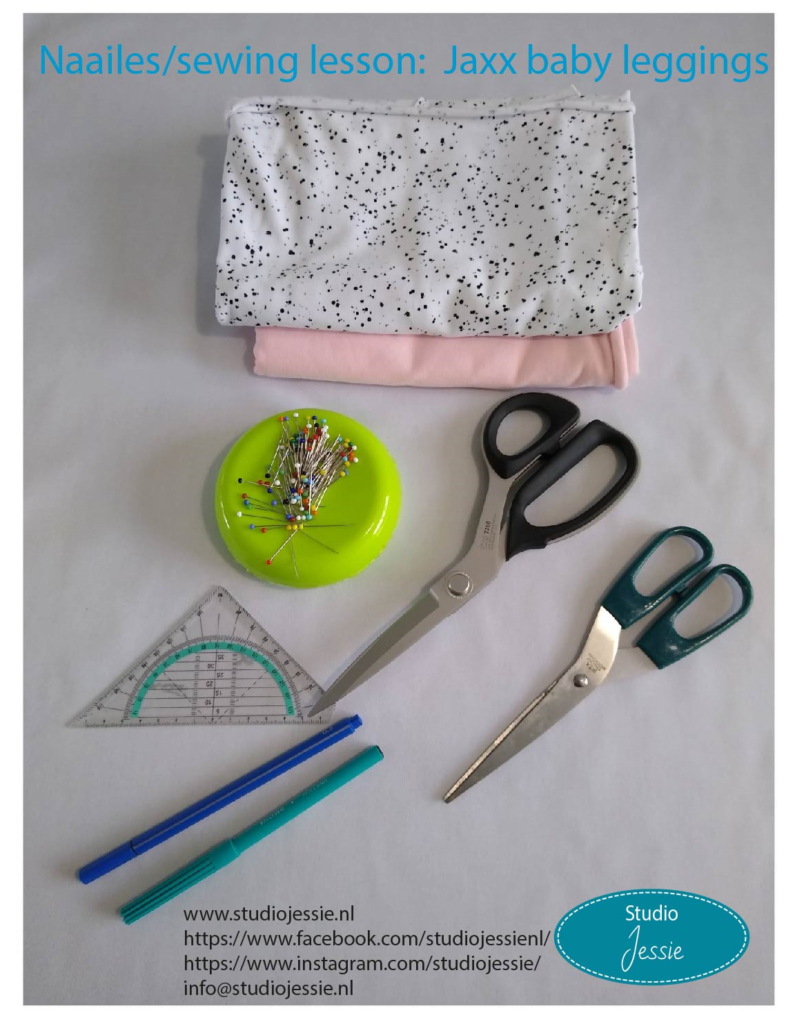
Benodigdheden / necessities
- Naaipatroon Jaxx babybroekje/legging
- patroonpapier
- papierschaar
- potlood, pen of stift
- tricotstof
- stofschaar
- geodriehoek
- kopspelden. Ik gebruik kopspelden met een glazen kop. Een glazen kop smelt niet als je de speld raakt tijdens het strijken.
- naaimachine
- eventueel een lockmachine en coverlockmachine (je kunt het ook met een gewone naaimachine stikken).
English:
- Sewing pattern Jaxx baby pants
- tracing paper
- paper scissors
- jersey fabric
- fabric scissors
- ruler
- pins. I use pins with a glass head, glass won’t melt when you iron.
- sewing machine
- you can also use a serger and a coverstitch machine. This is nog necessary, you can also stitch with a stretch stitch on a regular sewing machine.

Aan de slag / let’s get started
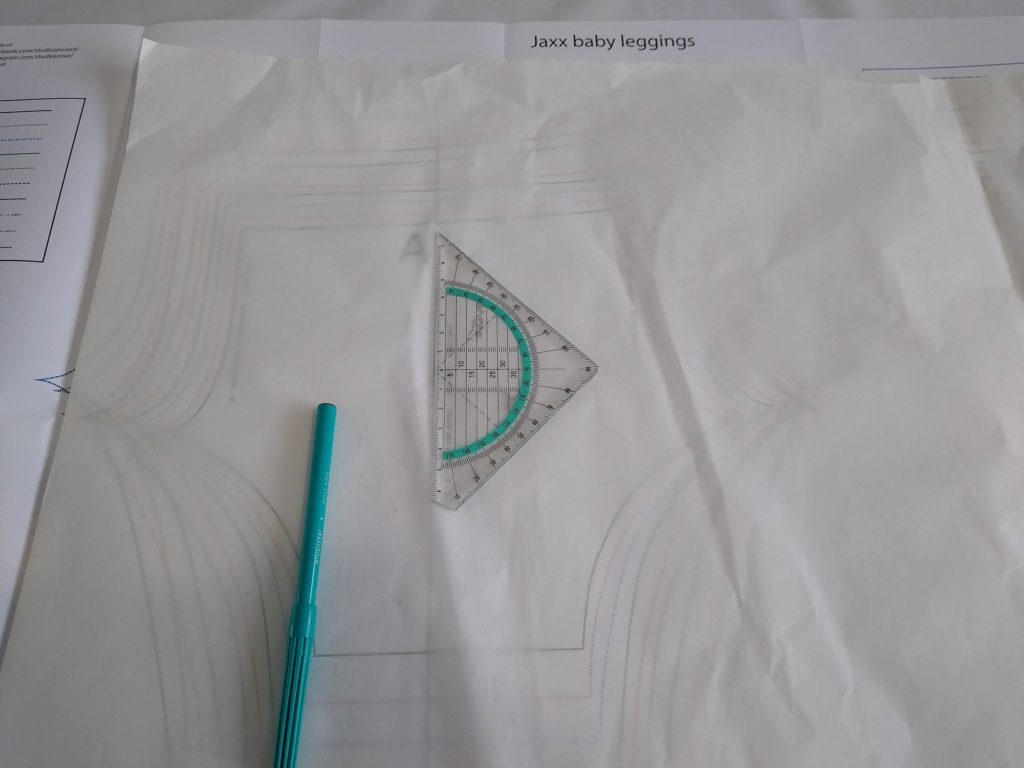
Gebruik de liniaal om de recht-van-draad-pijl op het patroonpapier te tekenen. Trek de juiste maat van de legging over op patroonpapier. Je kunt hiervoor potlood, pen of stift gebruiken. Voor de duidelijkheid heb ik nu een stift gebruikt, maar meestal gebruik ik pen of potlood. Met een dunnere lijn kun je nauwkeuriger werken.
Use the ruler to draw the grainline arrow on the tracing paper. Trace the correct size of the legging onto the tracing paper. You can use a pencil, pen or marker for this. I have used markers now, so you can see my lines on the picture. But normally I use a pen or a pencil. With a thinner line you can work more accurately.
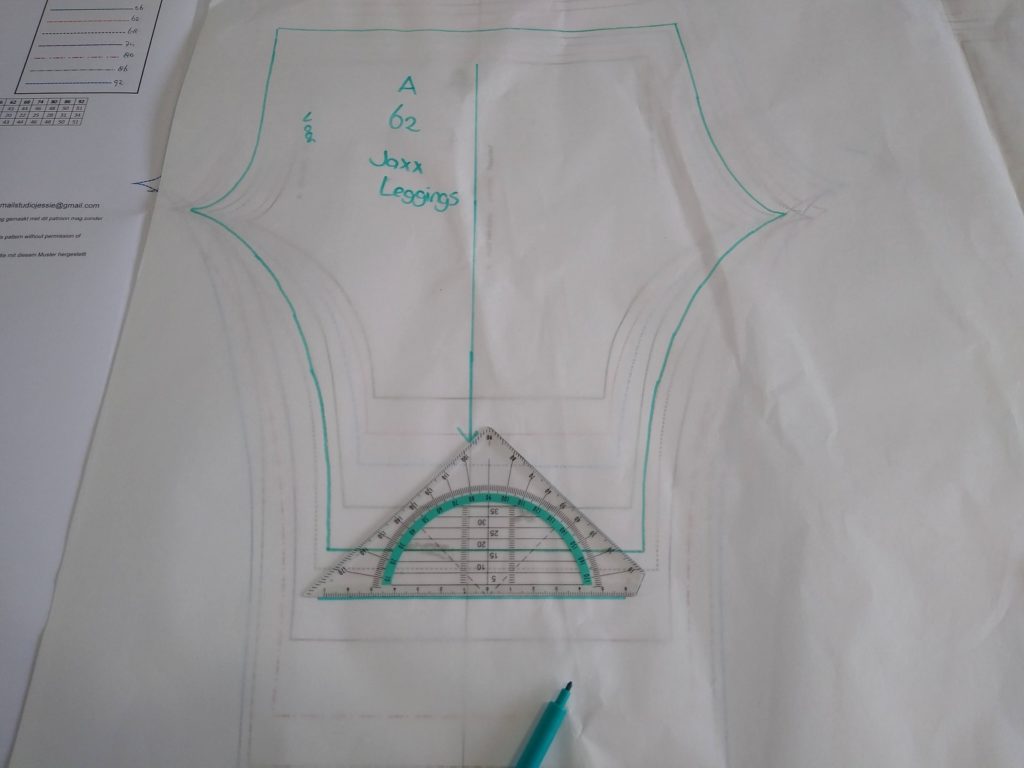
Het patroon bevat geen naadwaarde en zoomwaarde, zodat je zelf kunt bepalen hoeveel mm of cm je toevoegt. De naadwaarde en zoomwaarde teken ik er altijd al bij op het patroonpapier. Zo’n babylegging in maat 62 maak ik wel vaker, het is immers een ideaal kraamcadeautje.
The pattern does not contain seam allowance, so you can choose by yourself how many mm or cm you add. I always draw the seam allowance (and the hems) on the tracing paper. I often use patterns more then one time.
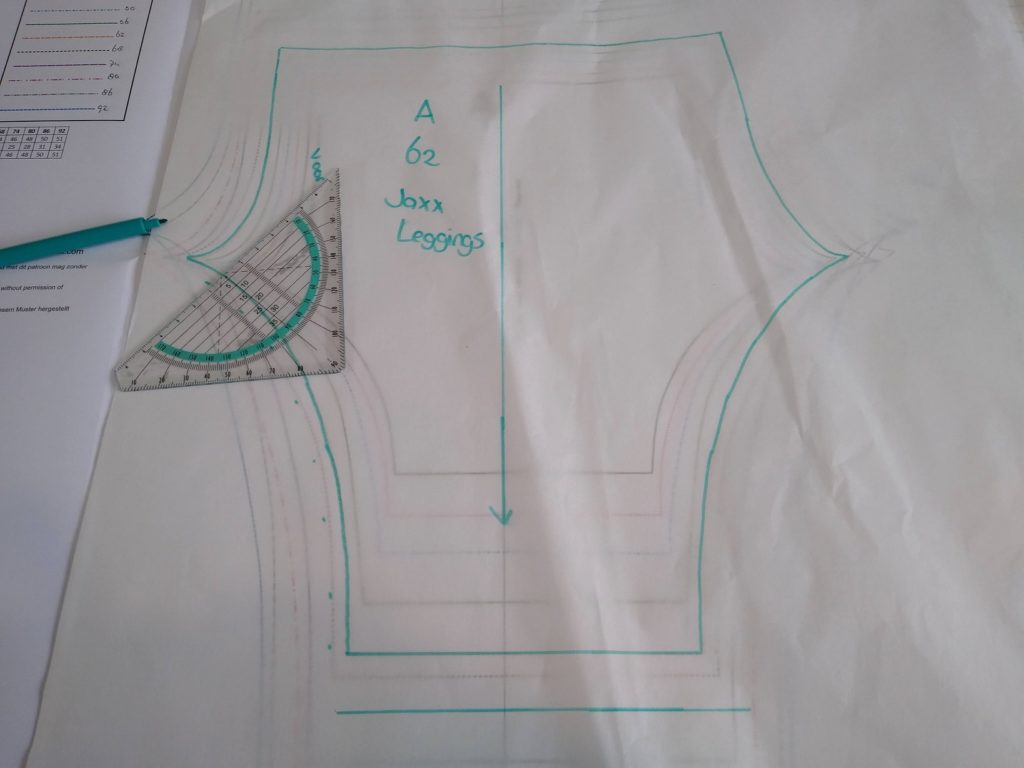
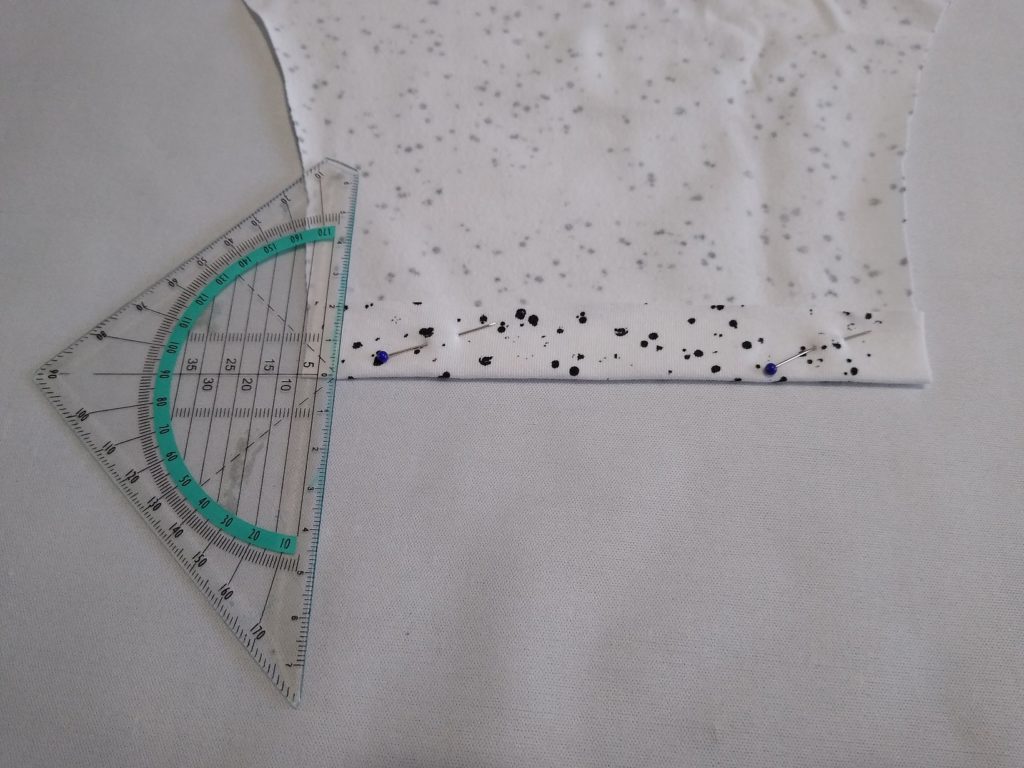
Onderaan de legging voeg ik 2 cm zoomwaarde toe, hiervoor gebruik ik een geodriehoek. Aan de overige randen voeg ik 7 mm naadwaarde toe, dat is ongeveer de breedte van mijn lockstiksel. Als je met een gewone naaimachine naait, dan zou ik 1 cm naadwaarde toevoegen.
At the bottom of the legging I add 2 cm for the seam. And on the other sides I add 7 mm seam allowance, that is the width of my serger stitch. If you sew with a regular sewing machine, you can add 1 cm seam allowance.
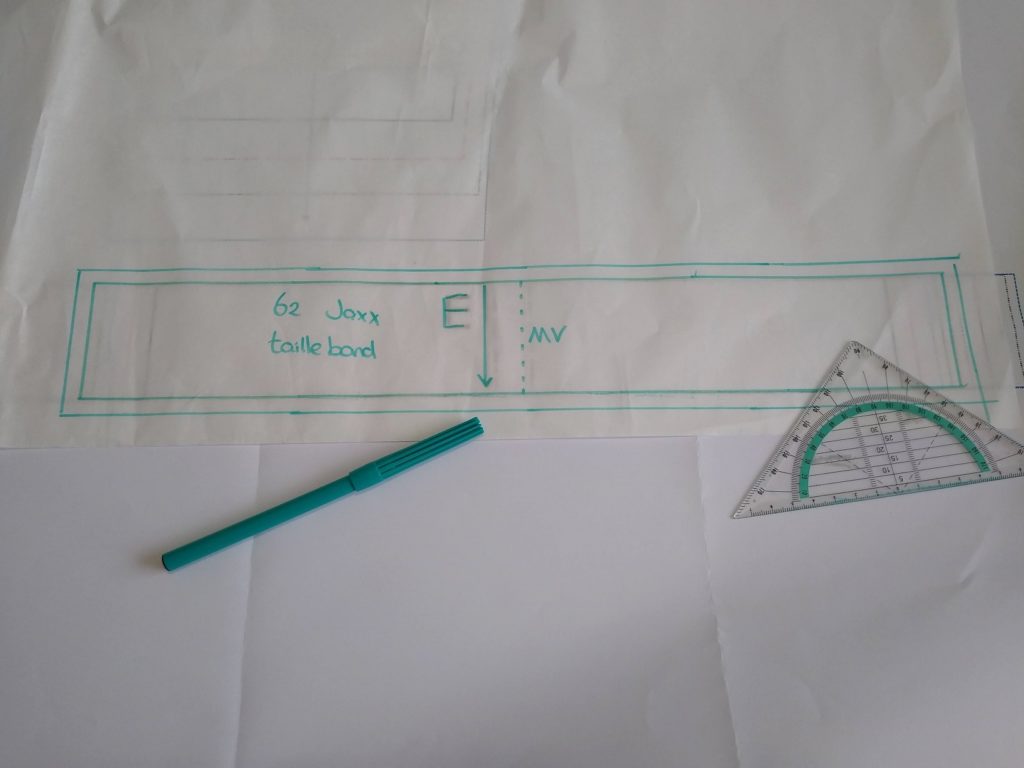
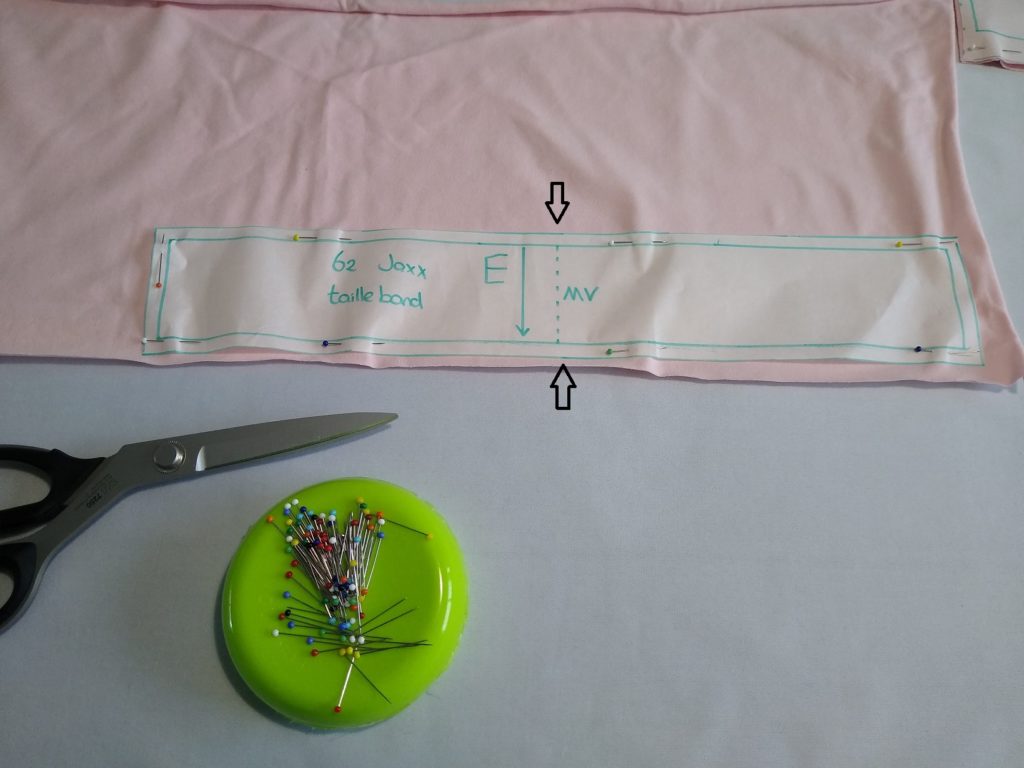
Neem ook de tailleband over op patroonpapier en geef met een stippellijn de middellijn aan, dat is middenvoor. Voeg ook hier rondom naadwaarde toe. Ik voegde 7 mm toe, omdat dat de breedte van mijn lockstiksel is. Naai je met een gewone naaimachine, dan zou ik 1 cm naadwaarde toevoegen.
Also trace the waistband on tracing paper. Mark the centerline with a dotted line, this is the center front of the waistband. Add seam allowance here too. I added 7 mm, as that is the width of my serger stitch. If you sew with a regular sewing machine, I would add 1 cm of seam allowance.
Knip de patroondelen uit.
Cut the pattern pieces.
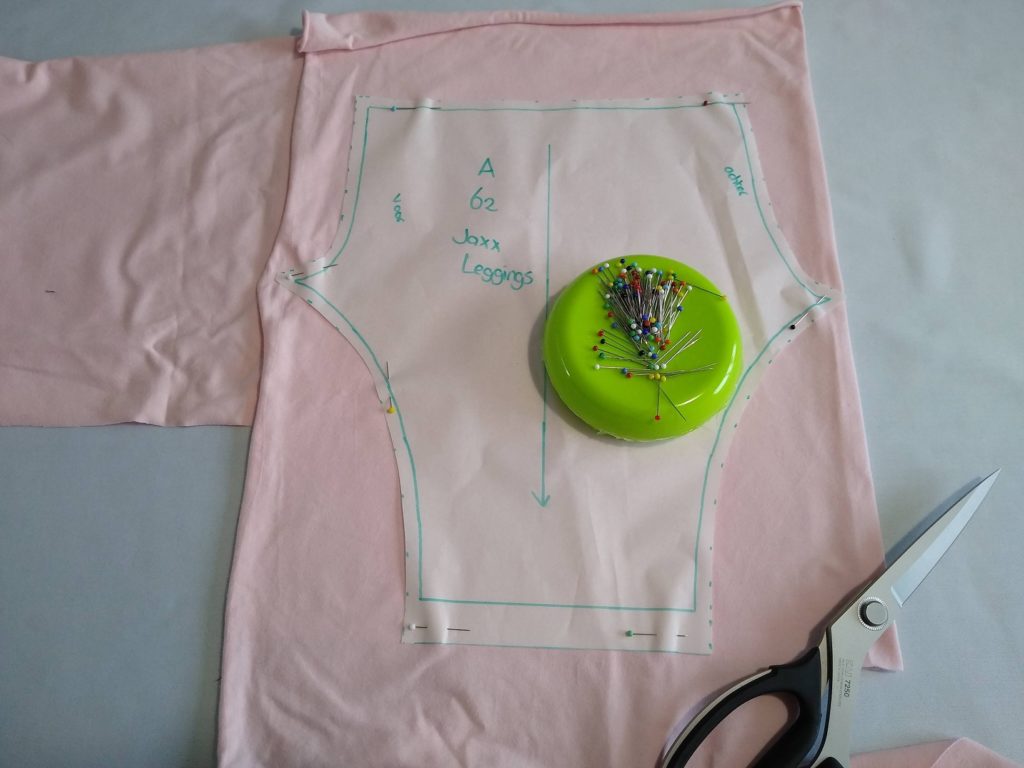
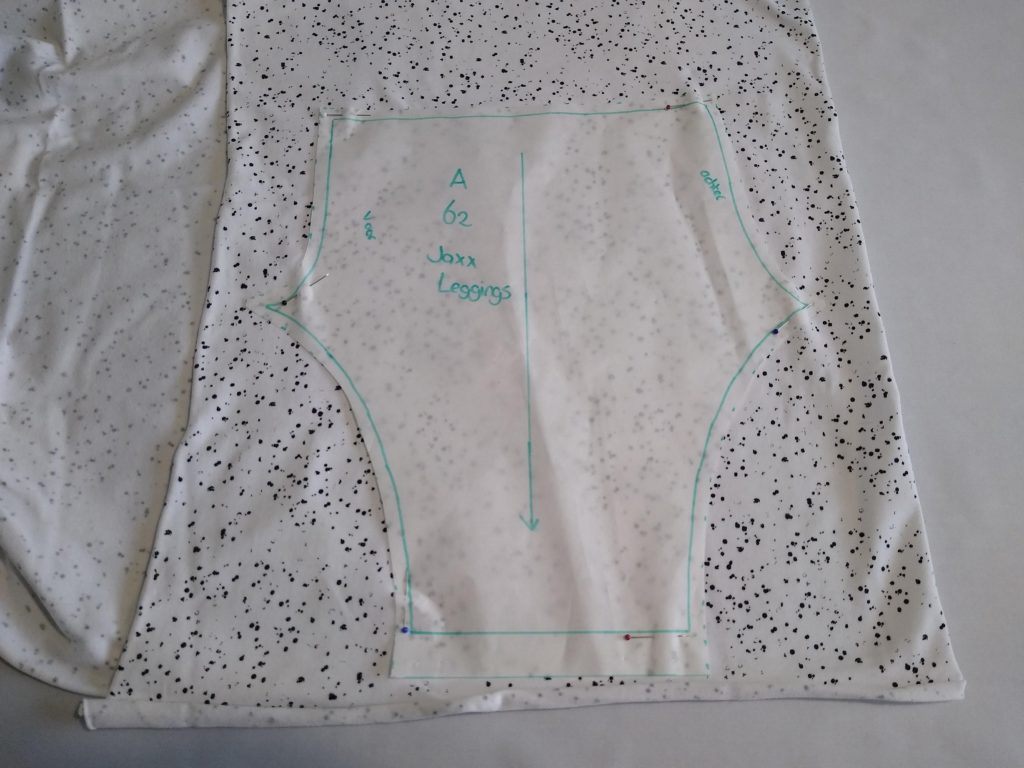
Als je de stof dubbel vouwt, dan kun je de patroondelen in één keer knippen. Je hebt namelijk het patroondeel 2x gespiegeld nodig (links en rechts). Vouw de stof dubbel. Je hoeft de stof niet precies dubbel te vouwen, want dan knip je het patroondeel uit het midden van de stof. Dat is zonde. Vouw aan de zijkant precies genoeg dubbel, zodat het patroondeel op de stof past. Dan kun je zuinig knippen en blijft er nog wat stof over.
Speld het patroondeel op de stof. Let erop dat de recht-van-draad-pijl gelijk loopt met de stofrichting. Knip met de stofschaar netjes langs het patroonpapier.
If you fold the fabric in half, you can cut the pattern pieces in one go. You need the pattern piece mirrored twice (left and right). You don’t have to fold the fabric exactly in half, because then you cut the pattern piece from the center of the fabric. Then you waste a lot of fabric. Fold in half on the side, just enough so that the pattern piece fits the fabric.
Pin the fabric piece to the fabric. Make sure that the grainline is alligned with the fabric direction. Use the fabric scissors to cut neatly along the tracing paper.
Leg ook het patroondeel voor de tailleband op de stof. Let hierbij weer op de recht-van-draad-pijl.
Knip precies langs het patroondeel de tailleband uit de stof. Op de plaatsen bij de twee pijltjes zet je twee kleine knipjes van 2 mm. Zo weet je straks precies wat middenvoor is van de tailleband.
Also place the pattern piece for the waistband on the fabric. Pay attention to the grainline.
Cut the waistband from the fabric. Place two small snips of 2 mm at the places indicated by the two arrows. This way you will exactly know what is the middle of the waistband.
Je kunt ook het patroondeel voor de tailleband dubbelvouwen en dit op een stuk dubbelgevouwen stof liggen. Dan hoef je minder te spelden. Zet op de plek van de pijl een knipje van 2 mm boven en onderaan in de tailleband.
You can also fold the waistband pattern piece in half and lay it on a piece of folded fabric. Then you have to pin less. Place a 2 mm cut at the top and bottom of the waistband at the location of the arrow. That will be the middle of the waistband.

Naaien / sewing
Je hebt nu de patroondelen geknipt en je kunt beginnen met het naaien. Voor het naaien met rekbare stoffen (tricot, breisels, joggingstof, summer sweat, french terry) gebruik ik de lockmachine en de coverlock machine. Je kunt ook een gewone naaimachine gebruiken, maar dan moet je wel een rekbaar stiksel gebruiken.
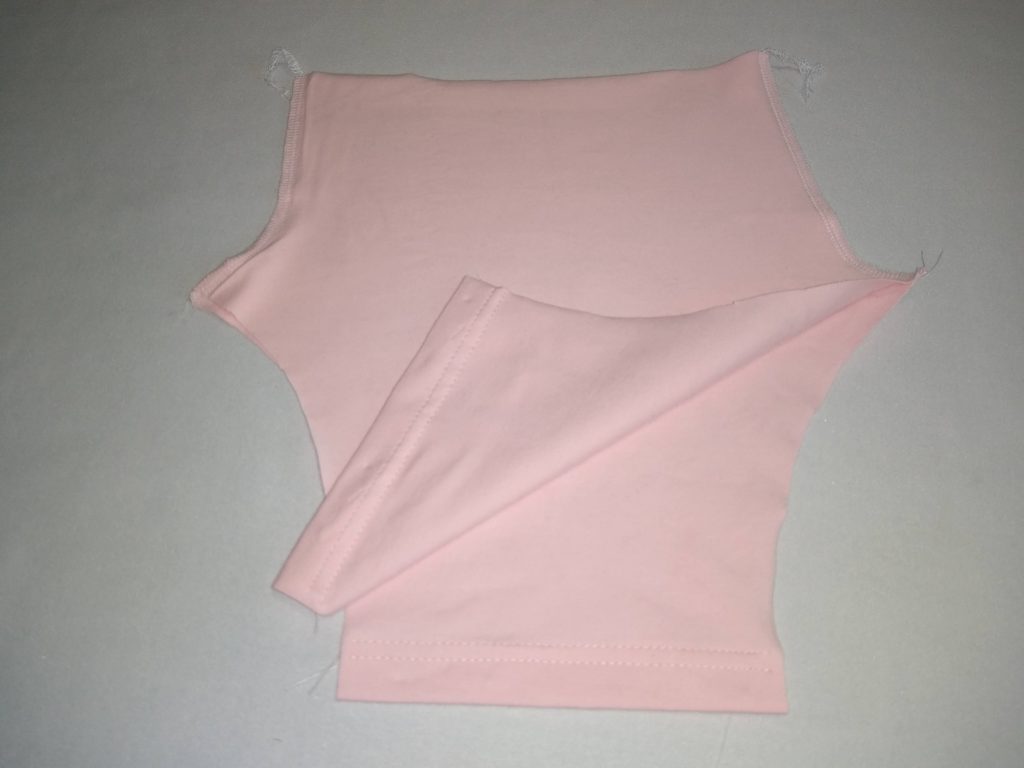
Als eerste vouw ik de onderkant van de pijpen 2 cm om voor de zoom. Strijk dit goed plat en stik de zoom met de coverlock of met een tweelingnaald op de gewone naaimachine. Normaal stik je de zoom als laatste, maar bij kleine babykleren is het handiger om de zoom eerst te stikken en pas later de pijpen te sluiten.
Now you have cut the pattern pieces and you can start sewing. For sewing with stretchy fabrics (jersey, knits, jogging, summer sweat, french terry) I use the serger and the coverstitch. You can also use a regular sewing machine, but you must use a stretch stitch / jersey stitch.
First, I fold the bottom of the legs 2 cm for the hem. Iron this flat and stitch the hem with the coverstitch or with a twin needle on a regular sewing machine. Normally you stitch the hem in the end, but with small baby clothes it is more convenient to stitch the hem first and close the legs later.
Stik de zoom door op de coverlock of met een tweelingnaald op de naaimachine.
Topstitch the seam on the coverstitch or with a twin needle on the regular sewing machine.
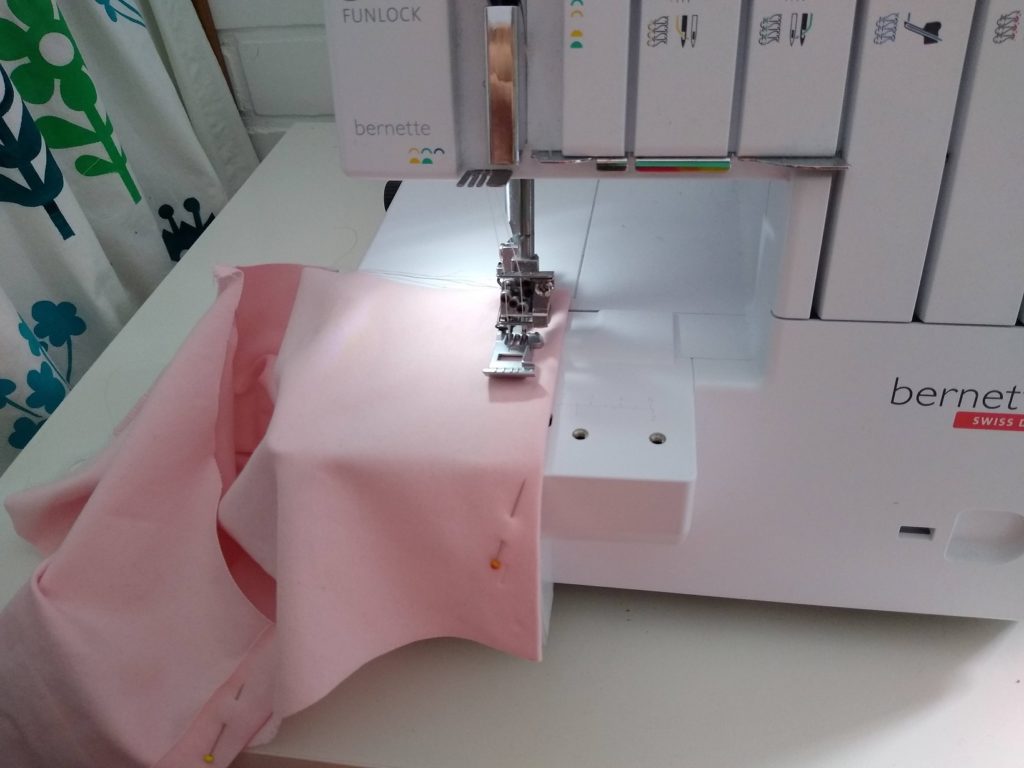
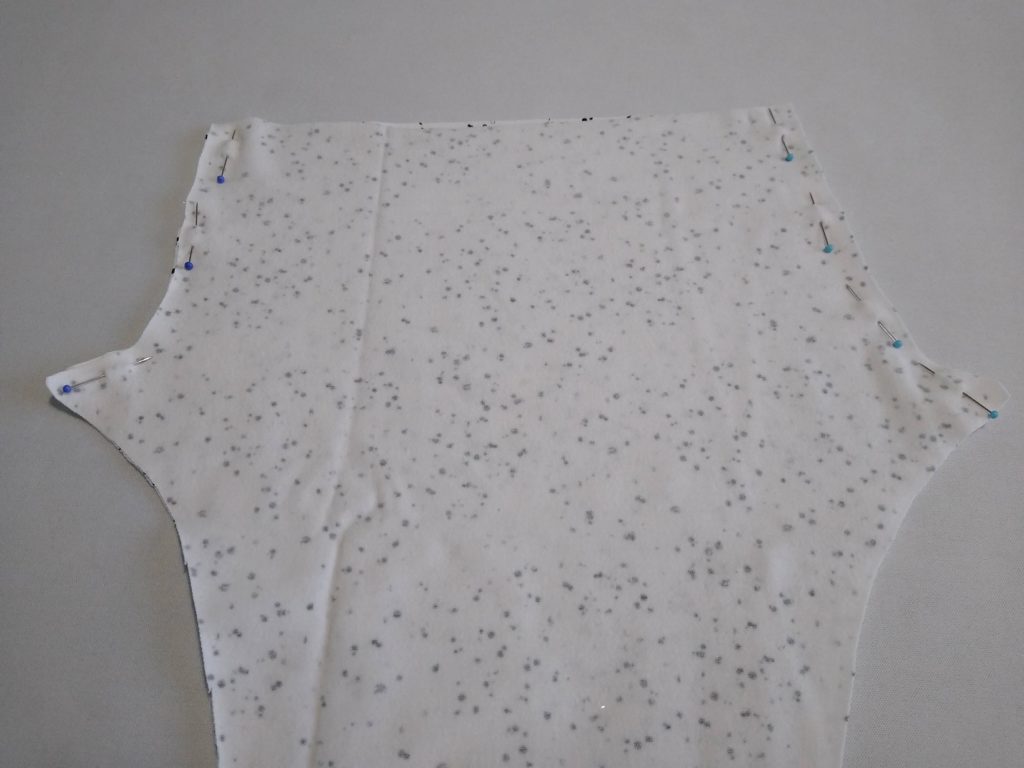
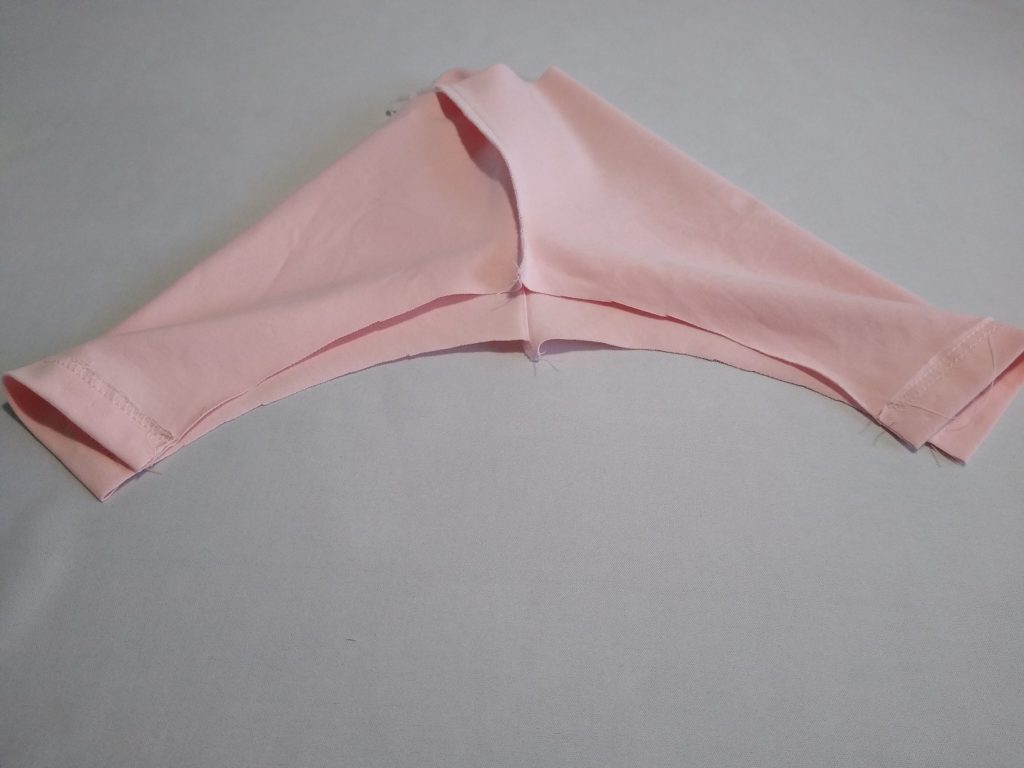
Speld de kruisnaad voor en kruisnaad achter en stik dit met de lockmachine of met een rekbare steek op de naaimachine.
Pin the centre seam line and the centre back line and stitch with a serger or a stretch stitch on the sewing machine.
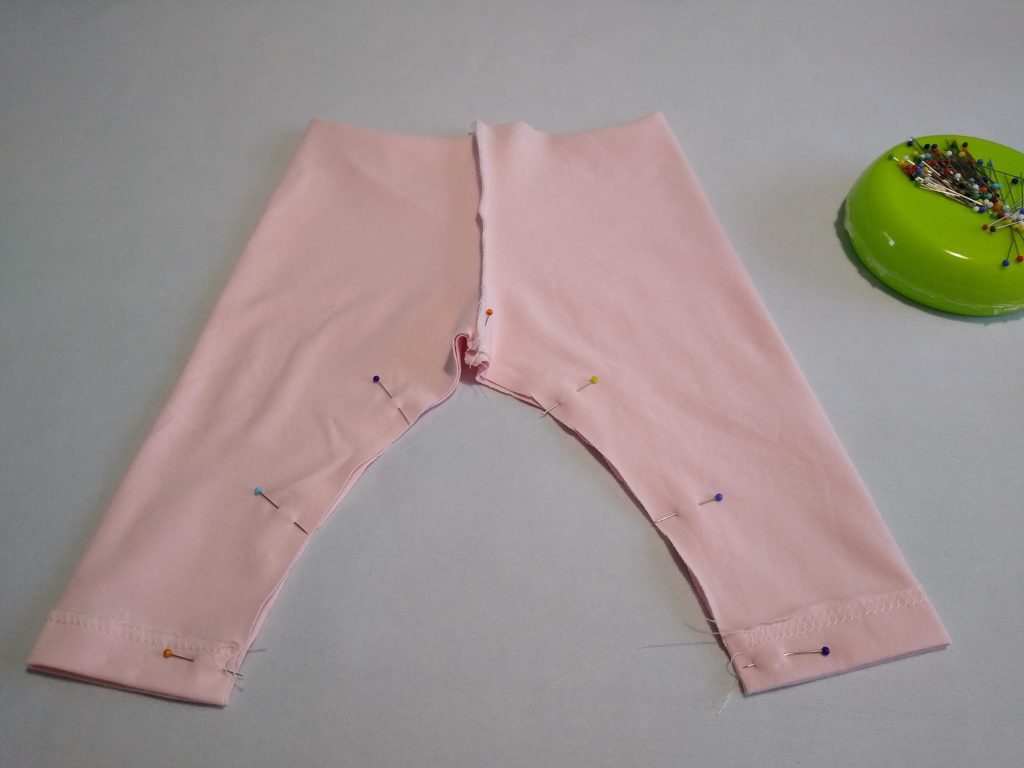
Vouw de legging open en leg de kruisnaden op elkaar. Speld de pijpen en stik dit met de lockmachine of met een rekbare steek op de naaimachine.
Unfold the legging and place the crotch seams together. Pin the legs and stitch with the serger or with a stretch stitch on the sewing machine.
Als de binnen beennaad gesloten is, dan hoeft alleen de tailleband er nog aan. Bij de kleinste maatjes gebruik ik geen elastiek in de tailleband. Vanaf maat 68 of 74 zou ik wel elastiek toevoegen.
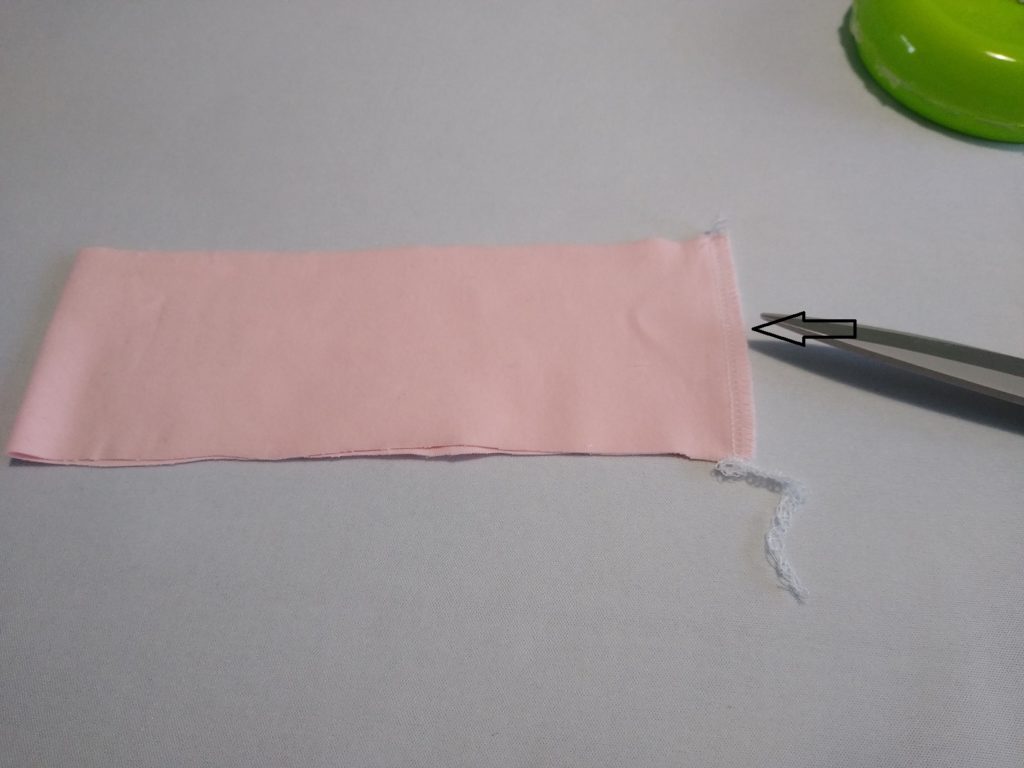
Vouw de tailleband dubbel, speld de zijkant en stik dit vast met de lockmachine of een rekbare steek op de naaimachine. Op de plaats van de twee pijltjes heb je als het goed is twee kleine knipjes van 2 mm gezet, zodat je weet wat middenvoor is.
When the inside leg seam is closed, you only have to attach the waistband. I do not use elastic in the waistband for the smallest sizes. From size 68 or 74 I would add elastic.
Fold the waistband in half, pin the side and sew with the serger or with a stretch stitch. At the place of the two arrows you should have placed two small cuts of 2 mm, that’s the middle front.
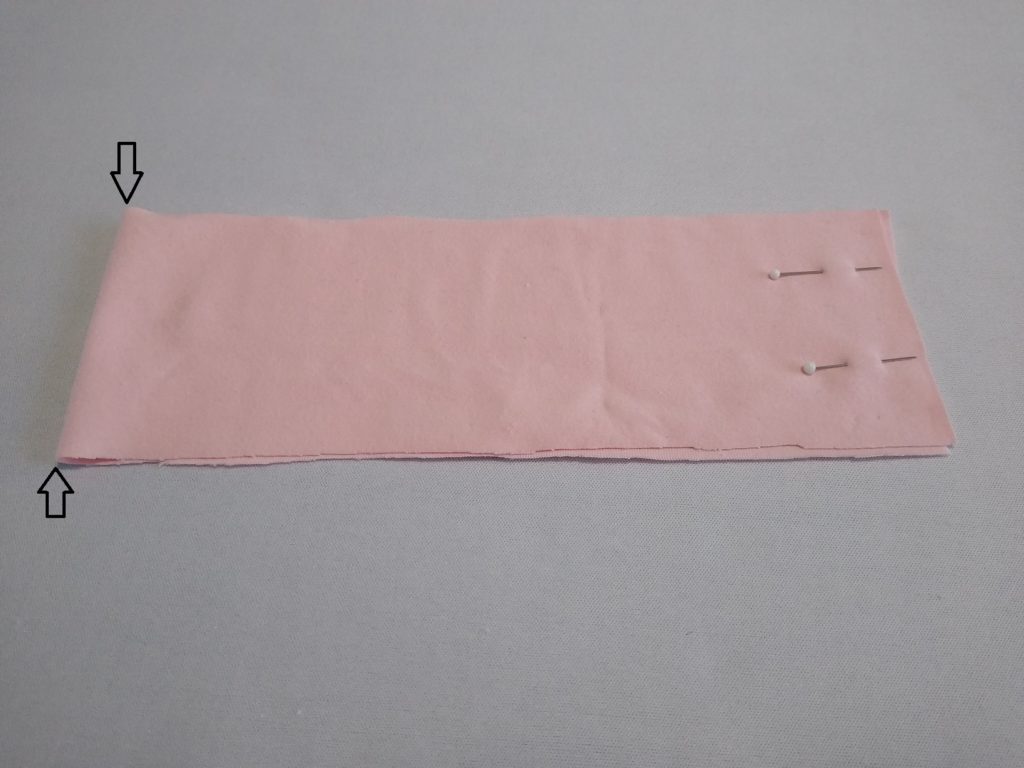
Als je met de lockmachine naait, dan is het handig om op de plaats van de pijl in de naad een knipje te zetten. Precies in het midden van de naad. Knip de naad niet helemaal door!
If you are sewing with a serger, it is useful to make a cut at the place of the arrow in the seam. Right in the middle of the seam. Do not cut the seam all the way!
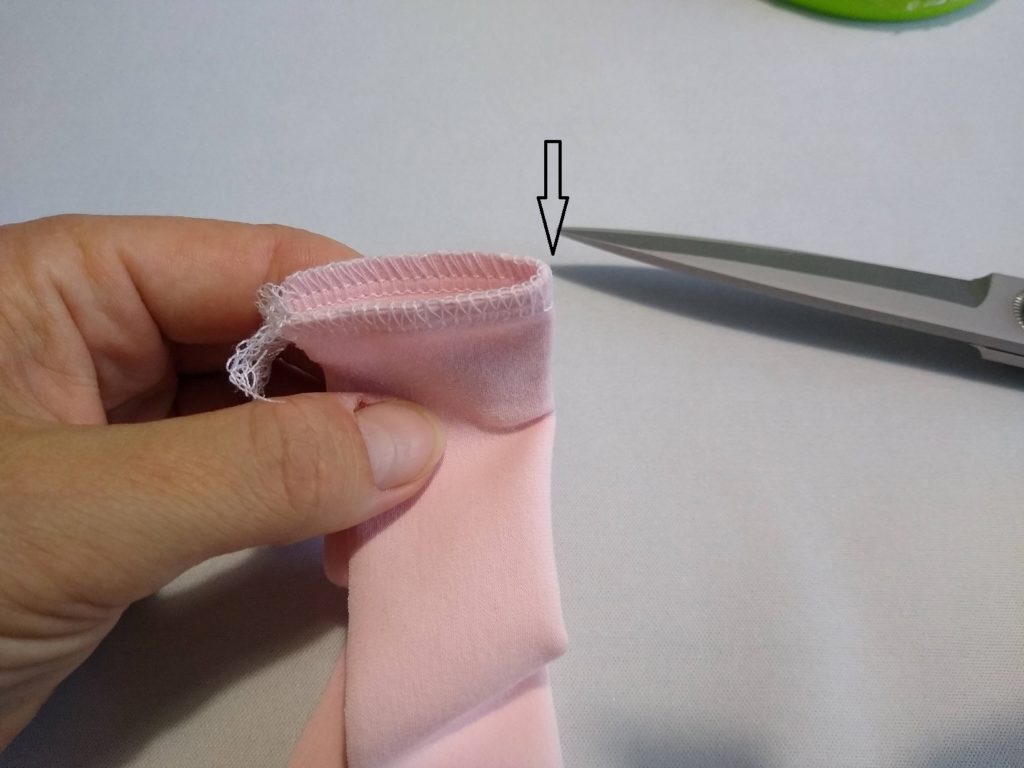
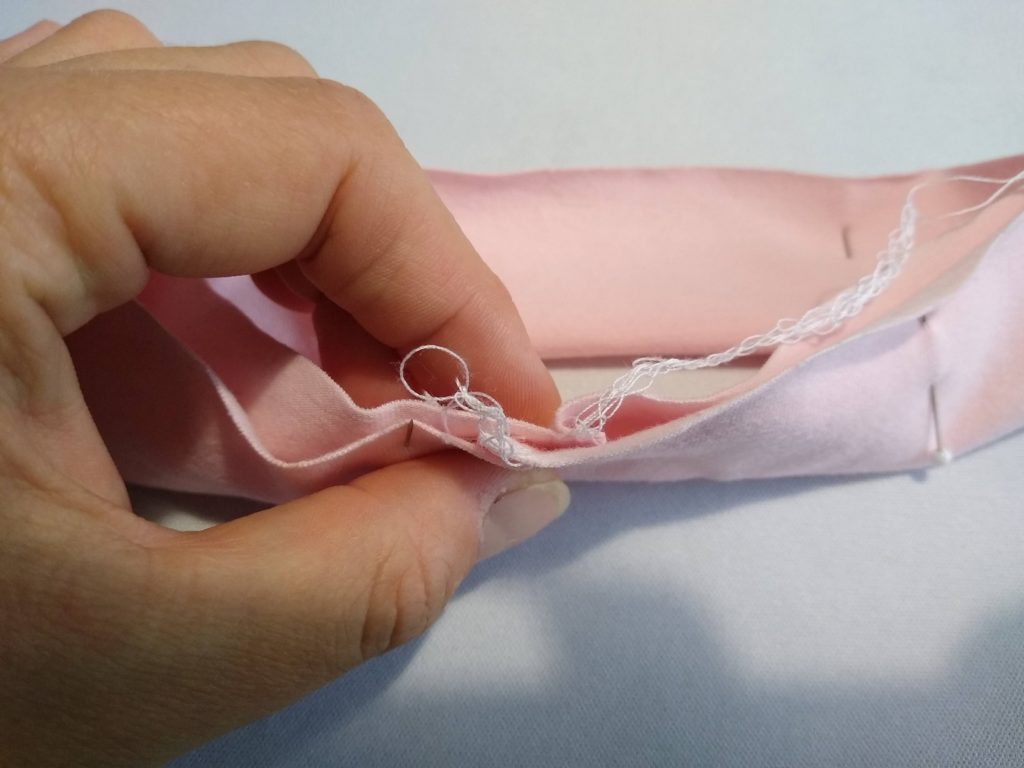
Je kunt dan de ene helft van de naad naar rechts vouwen en de andere helft naar links. Als je dan de tailleband dubbel vouwt, dan is het niet zo dik.
You can then fold one half of the seam to the right and the other half to the left. If you fold the waistband in half after cutting the middle, it will not be that thick.

Vouw de tailleband dubbel met de verkeerde kanten op elkaar en strijk dit netjes plat.
Fold the waistband in half, wrong sides together and iron it neatly flat.
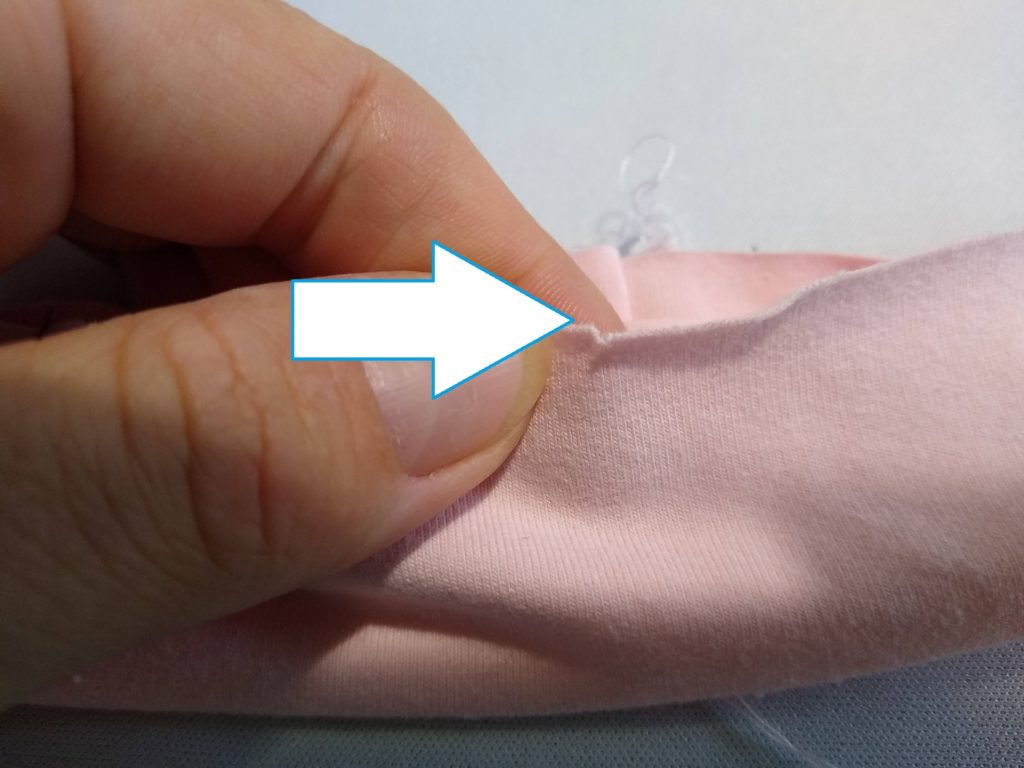
Je hebt in de tailleband een knipje van 2 mm gezet, dit knipje komt precies middenvoor. De naad in de tailleband komt middenachter.
You have placed a 22 mm cut in the waistband, this cut comes exactly in the middle front. The seam in the waistband comes at the center back of the leggings.
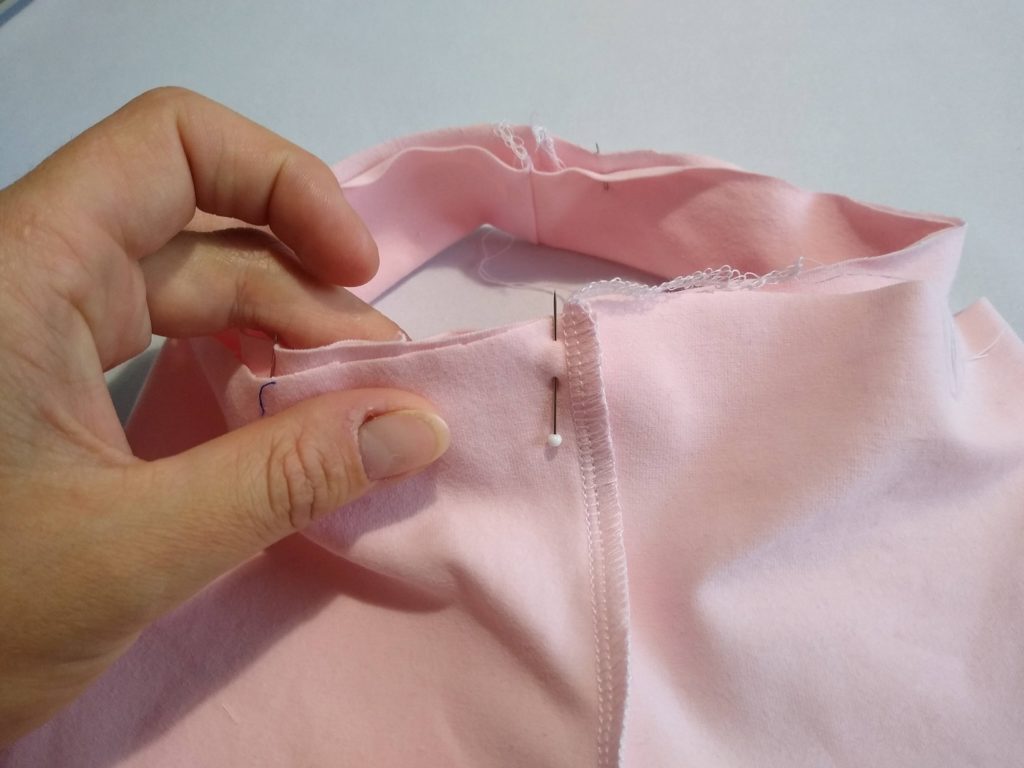
Speld de tailleband in de legging. Je hebt de legging binnenstebuiten. Zet een speld middenvoor en middenachter. Verder de tailleband vervolgens netjes daartussen links en rechts.
Pin the waistband into the leggings. The legging is inside out. Place a pin mid front and mid back. Then pin the waistband neatly in between left and right.
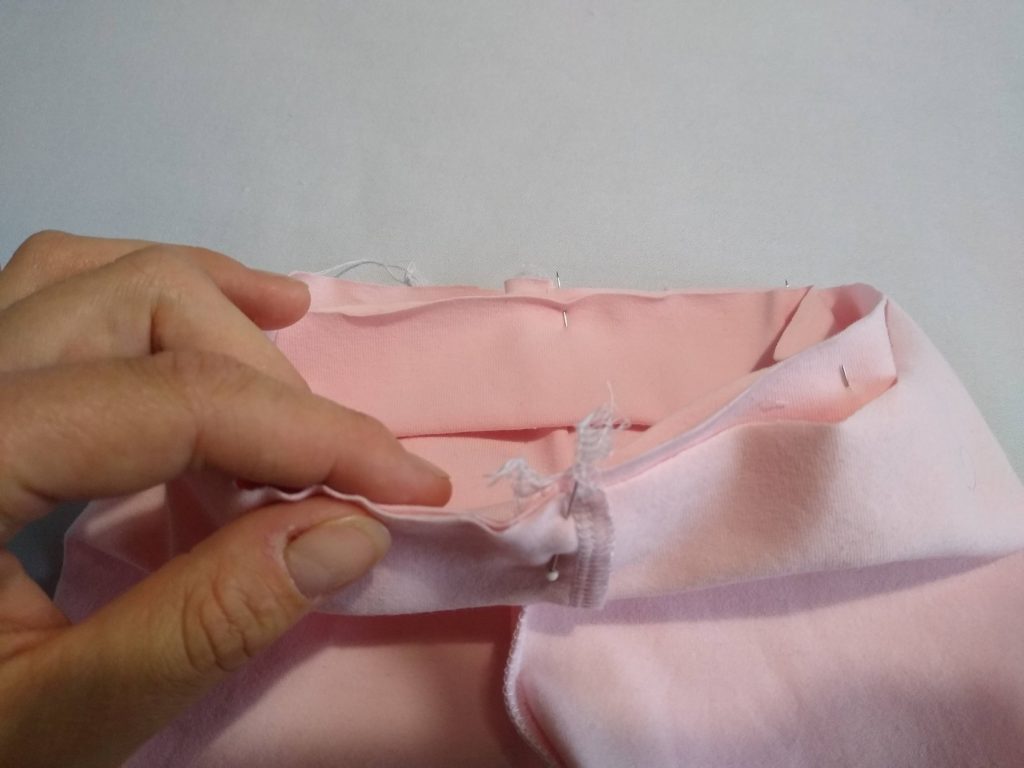
Zet de tailleband vast met de lockmachine of met een rekbare steek op de naaimachine. Bij maat 38 tot en met 68 voeg ik zelf geen elastiek toe. Vanaf maat 74 doe ik wel elastiek in de tailleband. Het elastiek mag net iets strakker zijn dan de tailleband. Je kunt het elastiek meteen sluiten en in de tailleband schuiven en daarna de tailleband aan de legging naaien. Je kunt ook de tailleband aan de legging naaien en een klein gat open laten. Door dat gat steek je dan het elastiek met behulp van een veiligheidsspeld. Als je het elastiek helemaal erdoor hebt gehaald, zet je het elastiek vast met een zigzagsteek op de naaimachine. Daarna stik je het gat dicht.
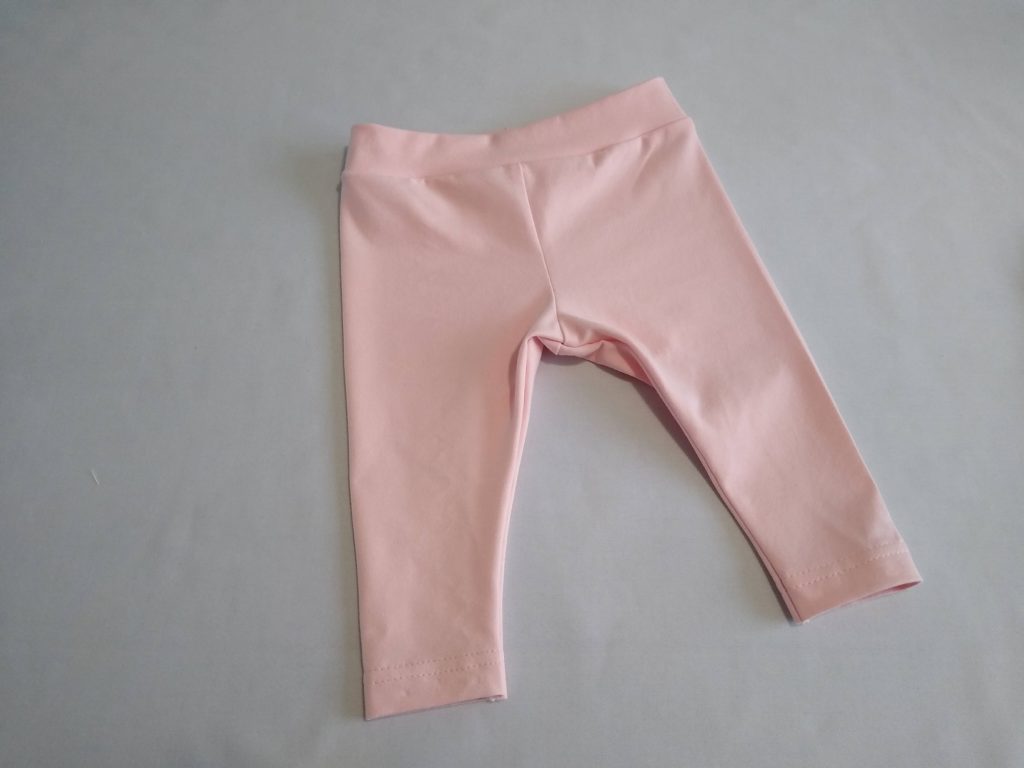
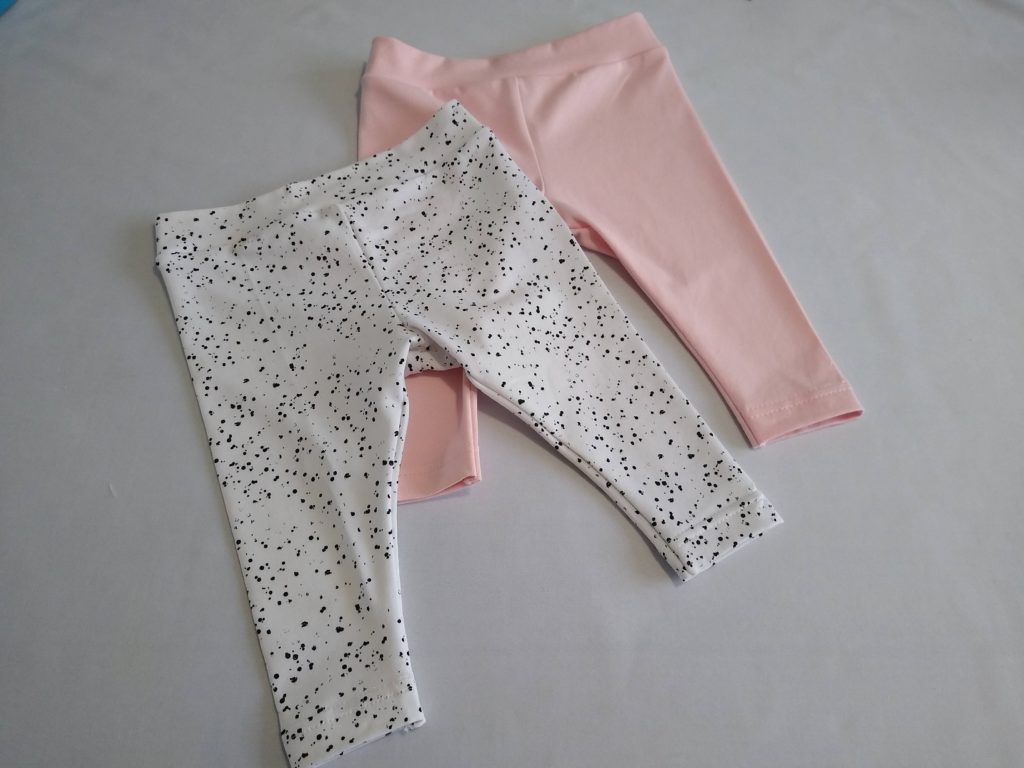
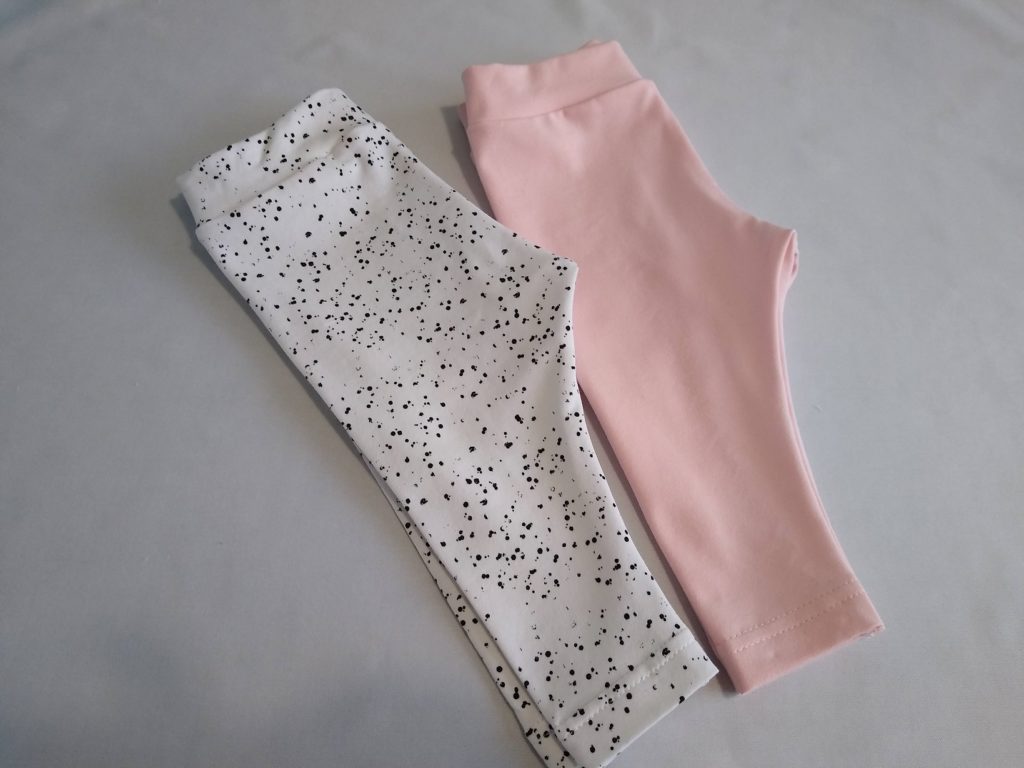
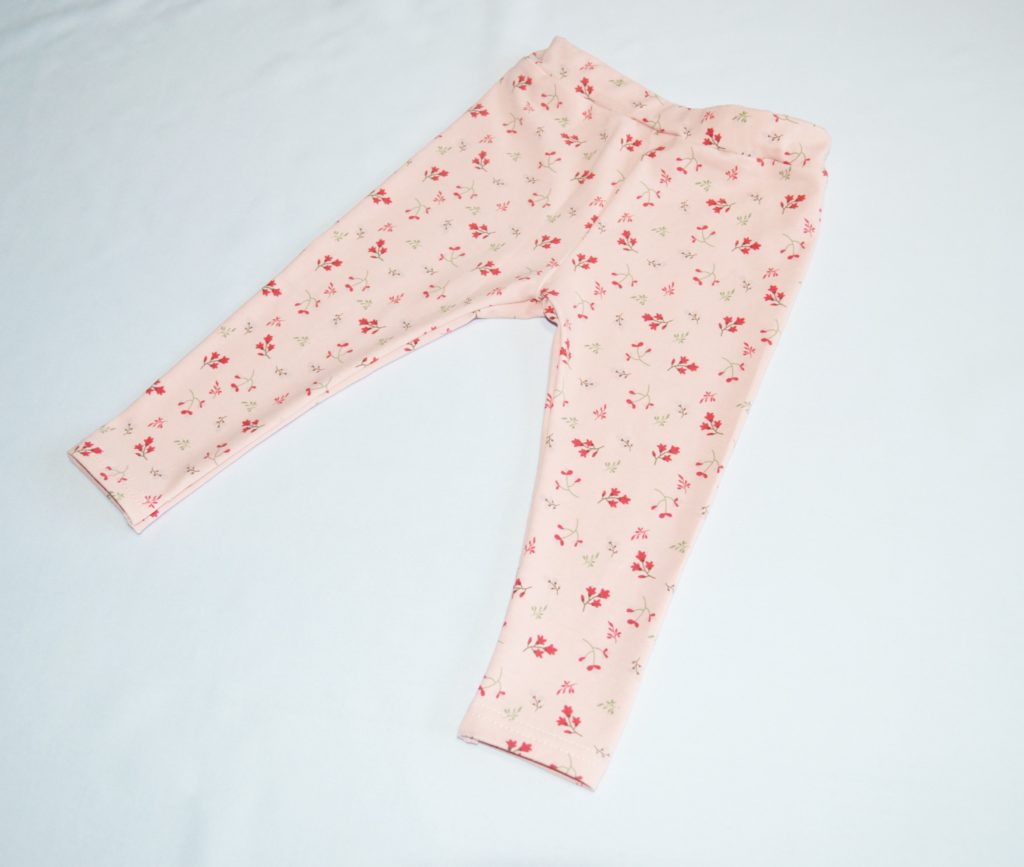
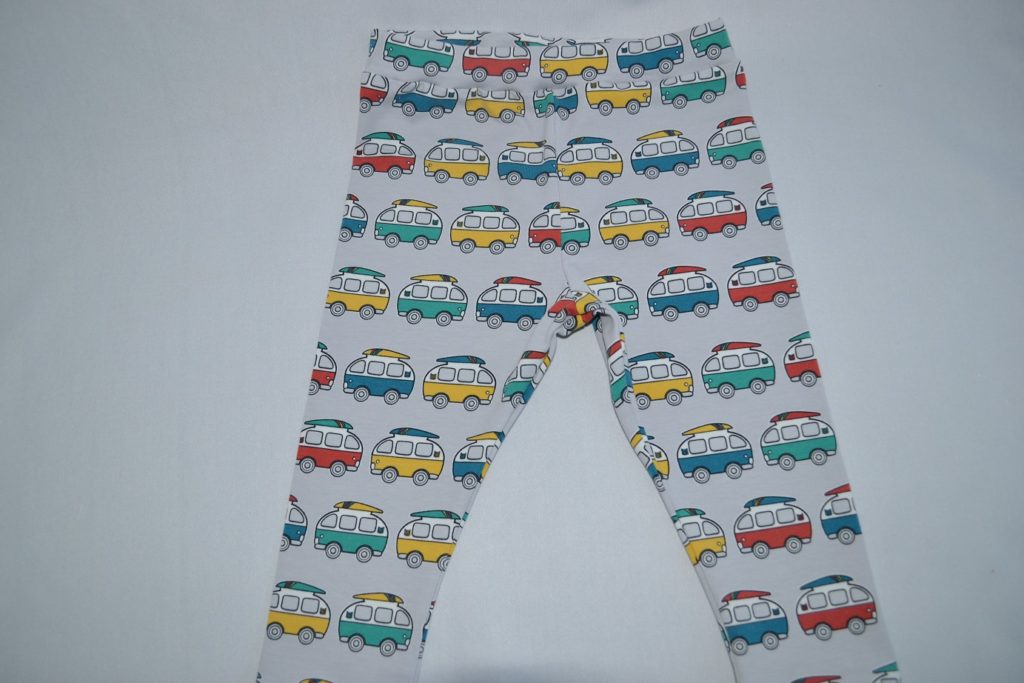
En dan is de legging klaar! Ik vind het een ideaal kraamcadeautje. Je kunt hem in allerlei stofjes maken, neutraal of effen of juist lekker vrolijk en bont!
Sew the waistband to the leggings. I don’t add elastic for sizes 38 to 68. From size 74 I do put elastic in the waistband. The elastic can be slightly tighter than the waistband.
You can close the elastic and slide it into the waistband, before you attach the waistband to the leggings. Or you can sew the waistband to the leggings and leave an opening. In that opening you can put the elastic through with a safety pin. When you have pulled the elastic all the way through, secure the elastic with a zigzag stitch on the sewing machine. Then you stitch the opening in the waistband on to the leggings.
Then the leggings are ready! I think this is a great maternity gift. You can make it in all kinds of fabrics, neutral or plain or colorful!
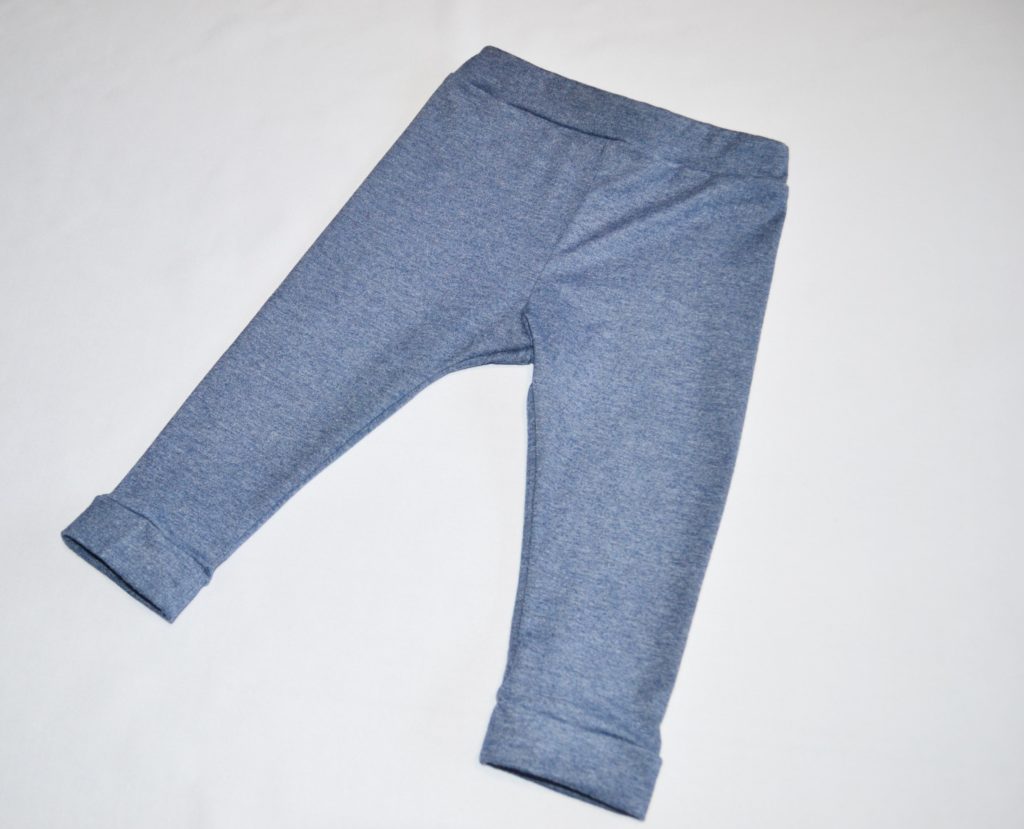
Deze gemêleerd blauwe heeft omgevouwen boordjes onderaan. Zo gaat het broekje lekker lang mee.
This blue one has folded cuffs on the legs, so this will fit for a long time.
Heb jij ook zo’n leuk broekje gemaakt? Laat de foto’s dan zien in de Studio Jessie Fans facebook groep. Je kunt de foto’s dan toevoegen aan het album ‘Jaxx baby pants’.
Of laat jouw foto’s zien op Instragram #studiojessienaaipatronen #studiojessiesewingpatterns #jaxxbabylegging #jaxxlegging
Did you make this pants? Show me your pictures in the Studio Jessie Fans Facebook group . Add your pictures in the album ‘Jaxx baby pants’.
Or show your pictures on Instagram #studiojessienaaipatronen #studiojessiesewingpatterns #jaxxbabylegging #jaxxlegging
Hieronder zie je nog de werkbeschrijving van het Jaxx broekje met boordjes onderaan de pijpen.
Below you can see the work description of the Jaxx pants with cuffs at the bottom of the legs. (in Dutch)


